Technical Specifications and Package Contents
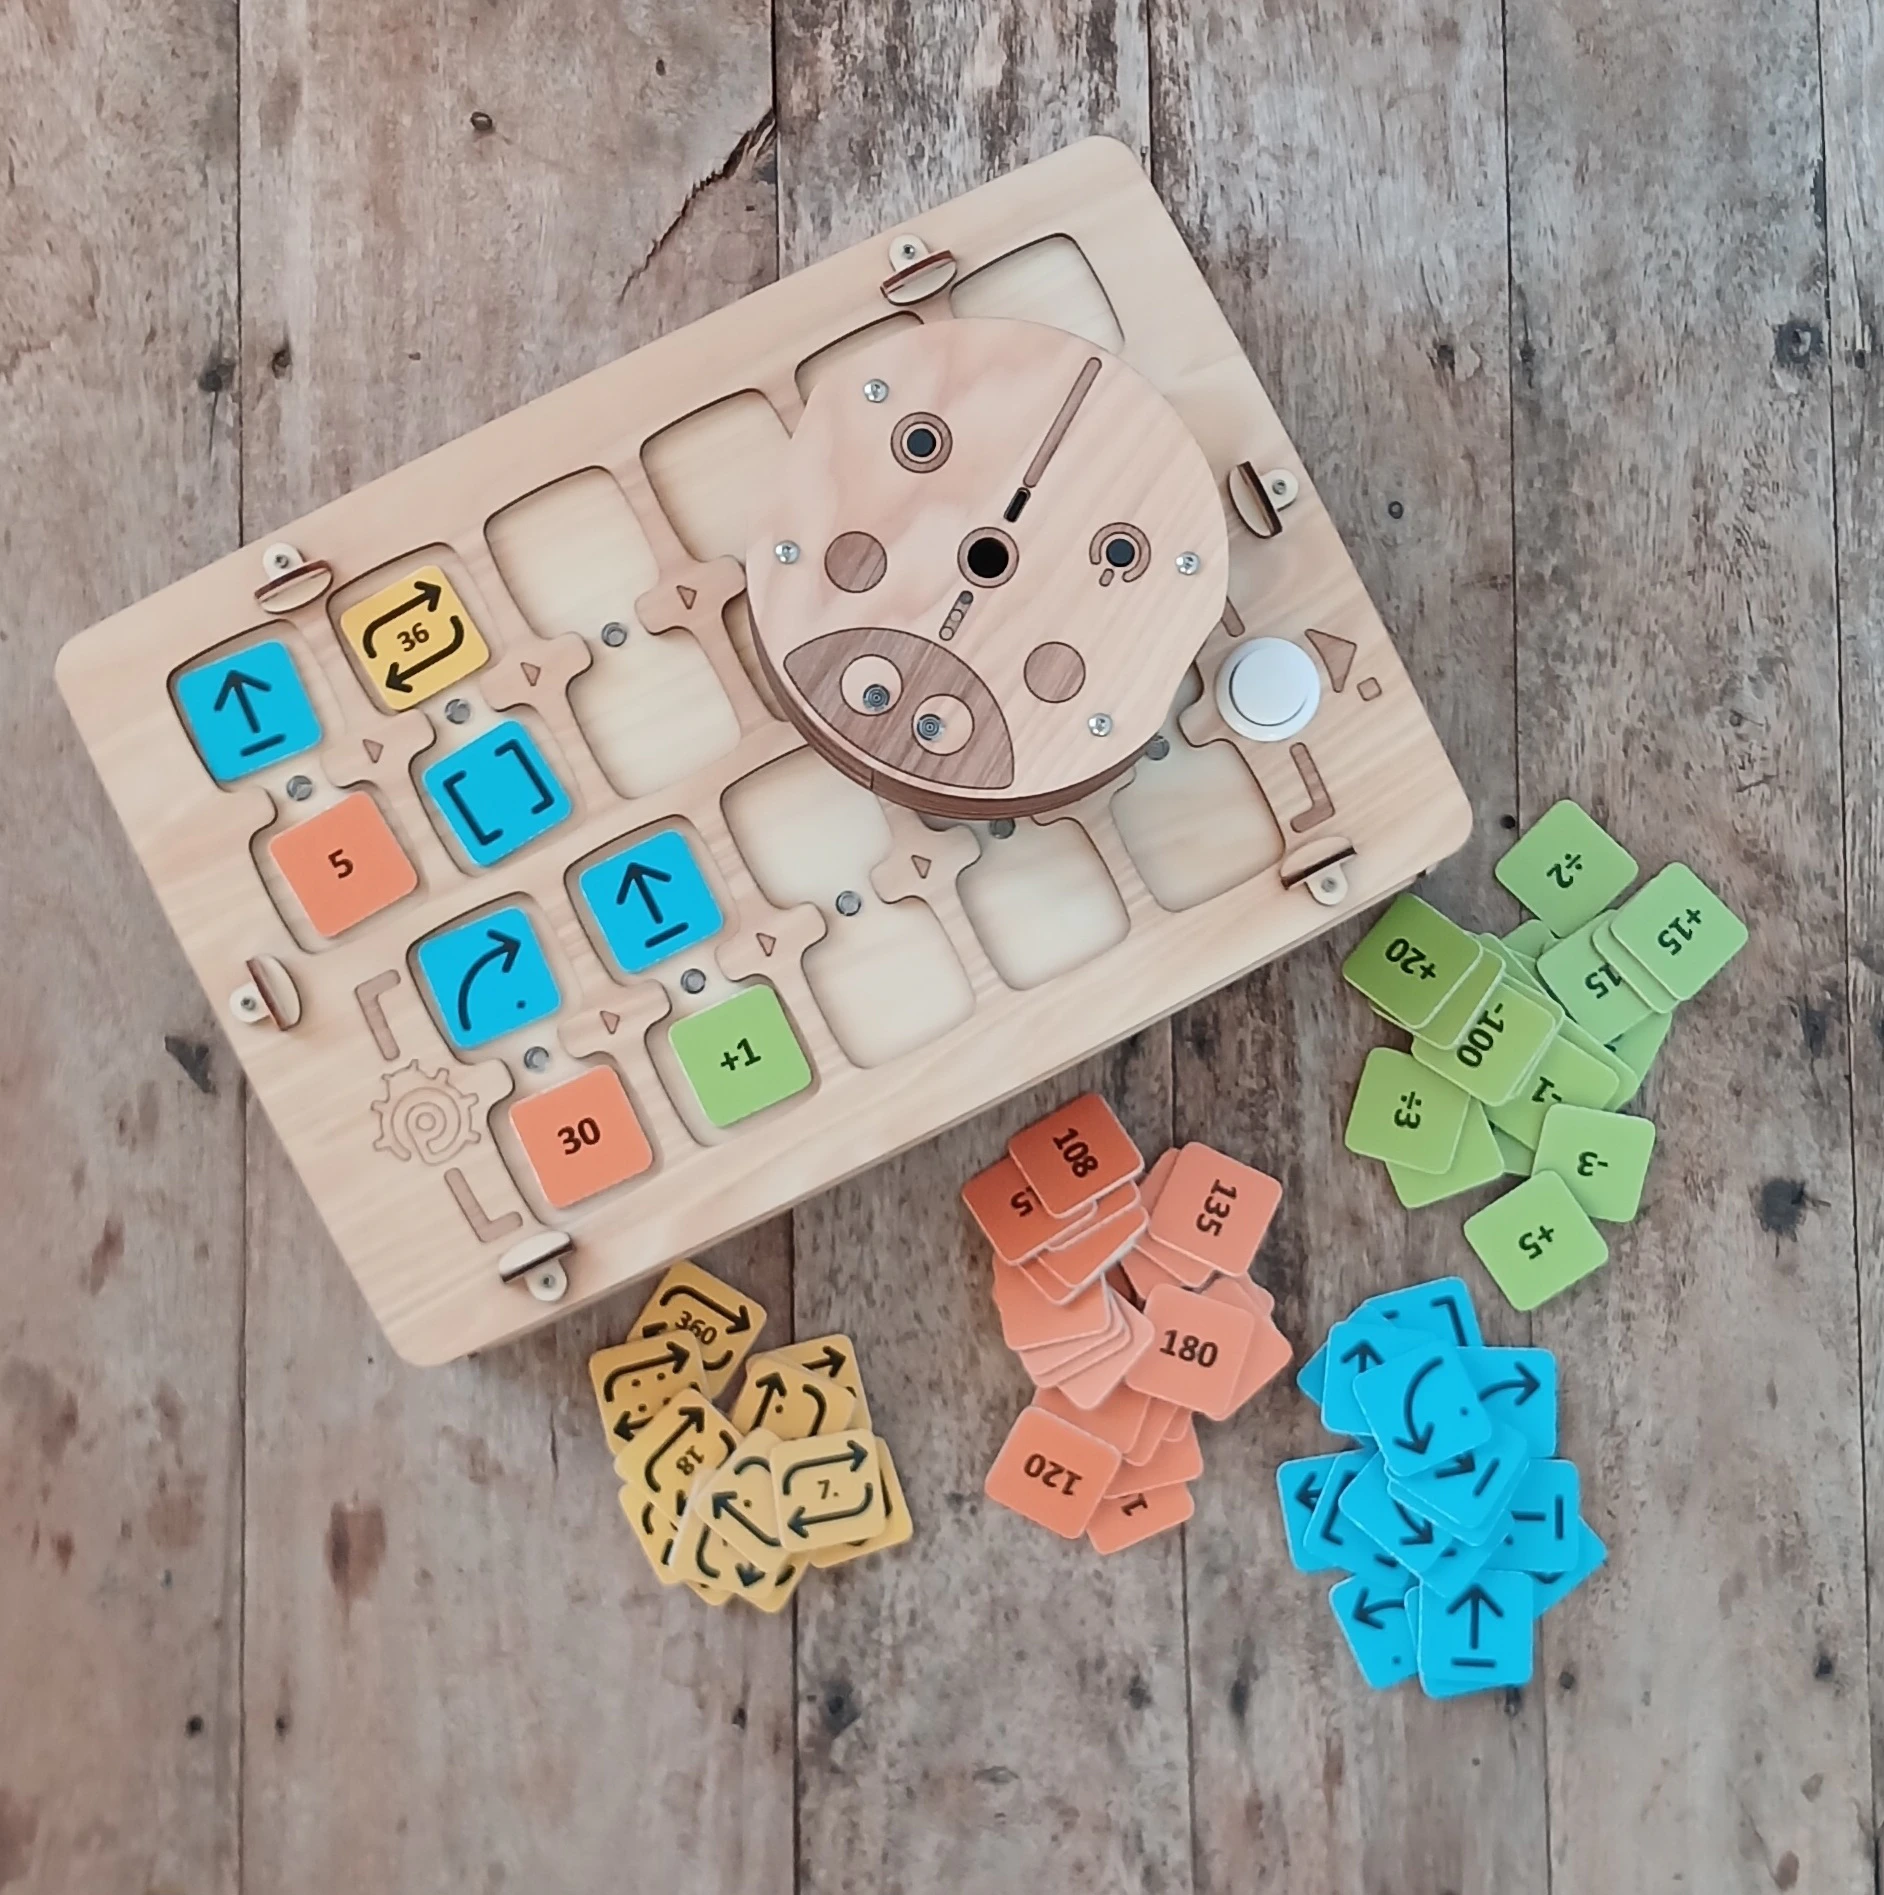
- Play robot
- Robot remote control
- Command, value, and arithmetic operation chips for creating programs
Package contents and appearance may vary slightly. Please verify at purchase.
Play Robot
Dimensions: D=125 mm, H=44 mm.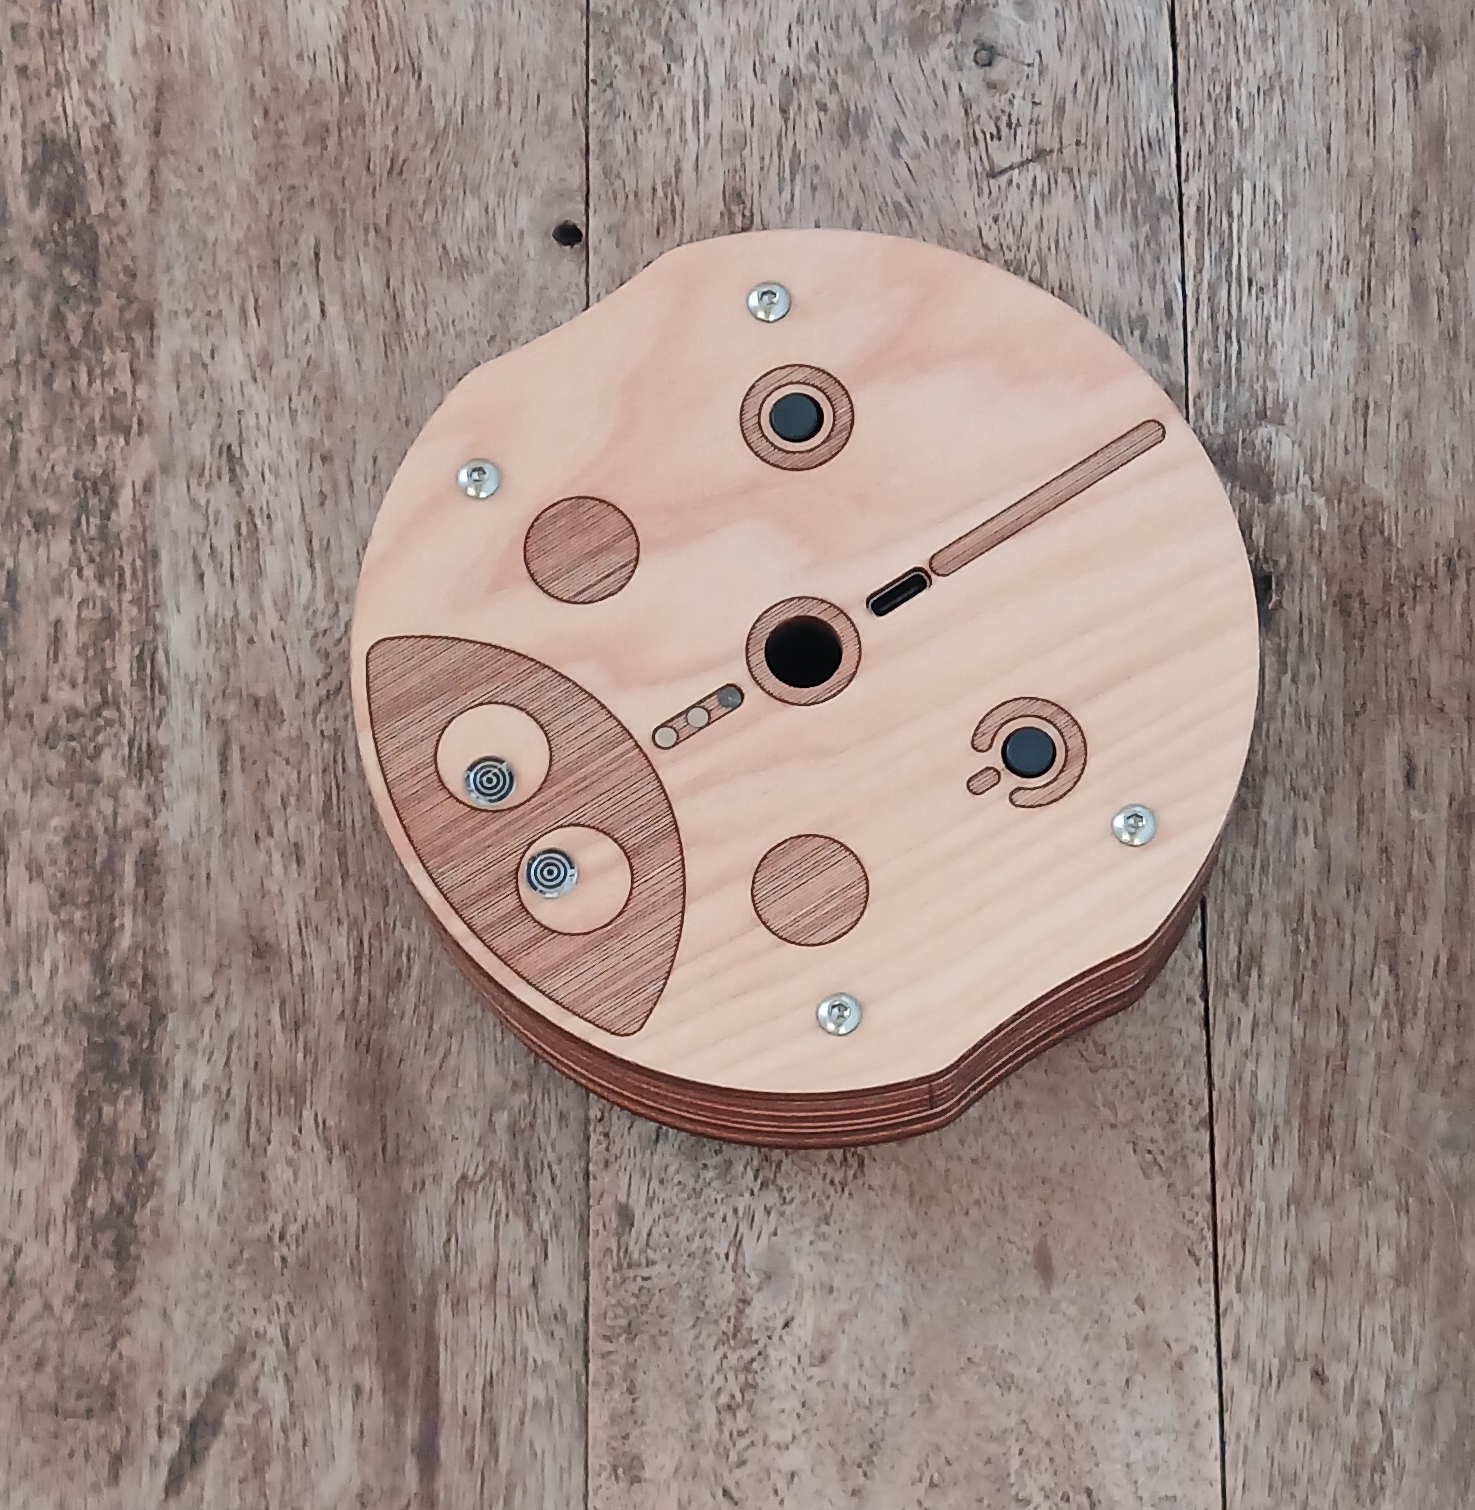
Remote Control
Dimensions: L=317 mm, W=217 mm, H=62 mm.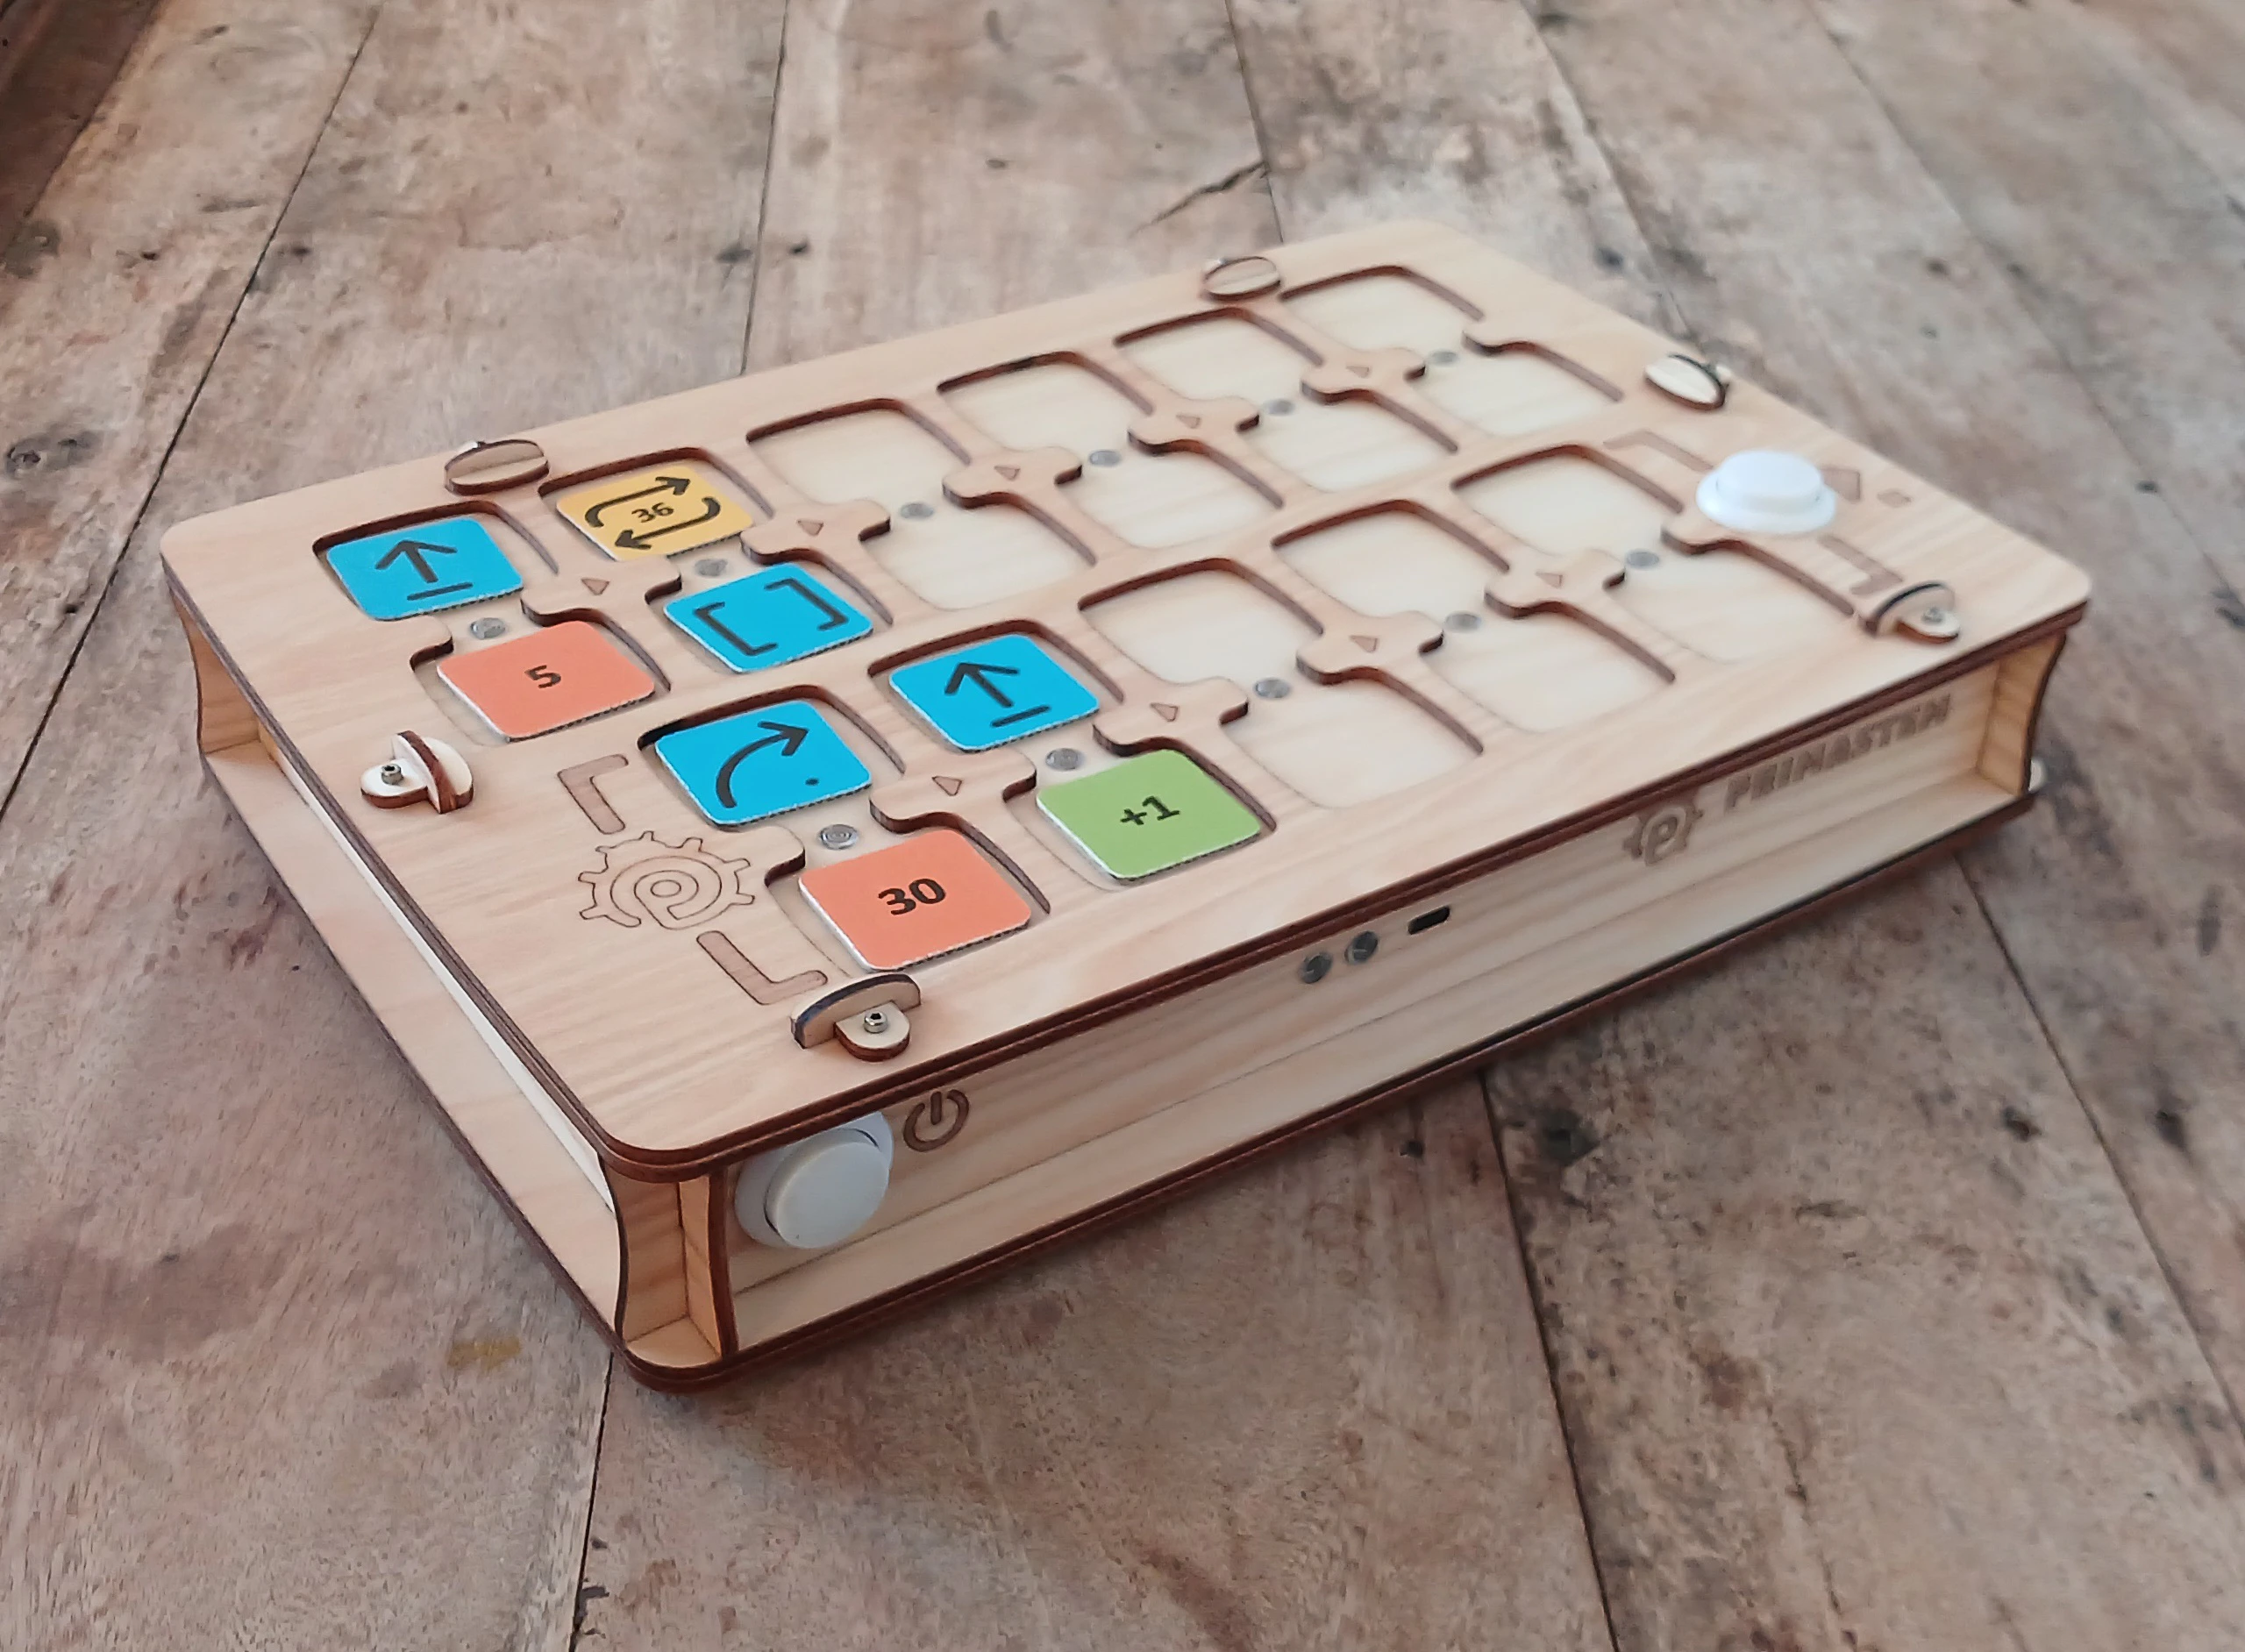
Instruction Chips
Dimensions: LxW=33 mm. The set includes chips for creating programs. Each chip is a command with a clear meaning and instruction. The sequence of blocks determines the robot’s behavior.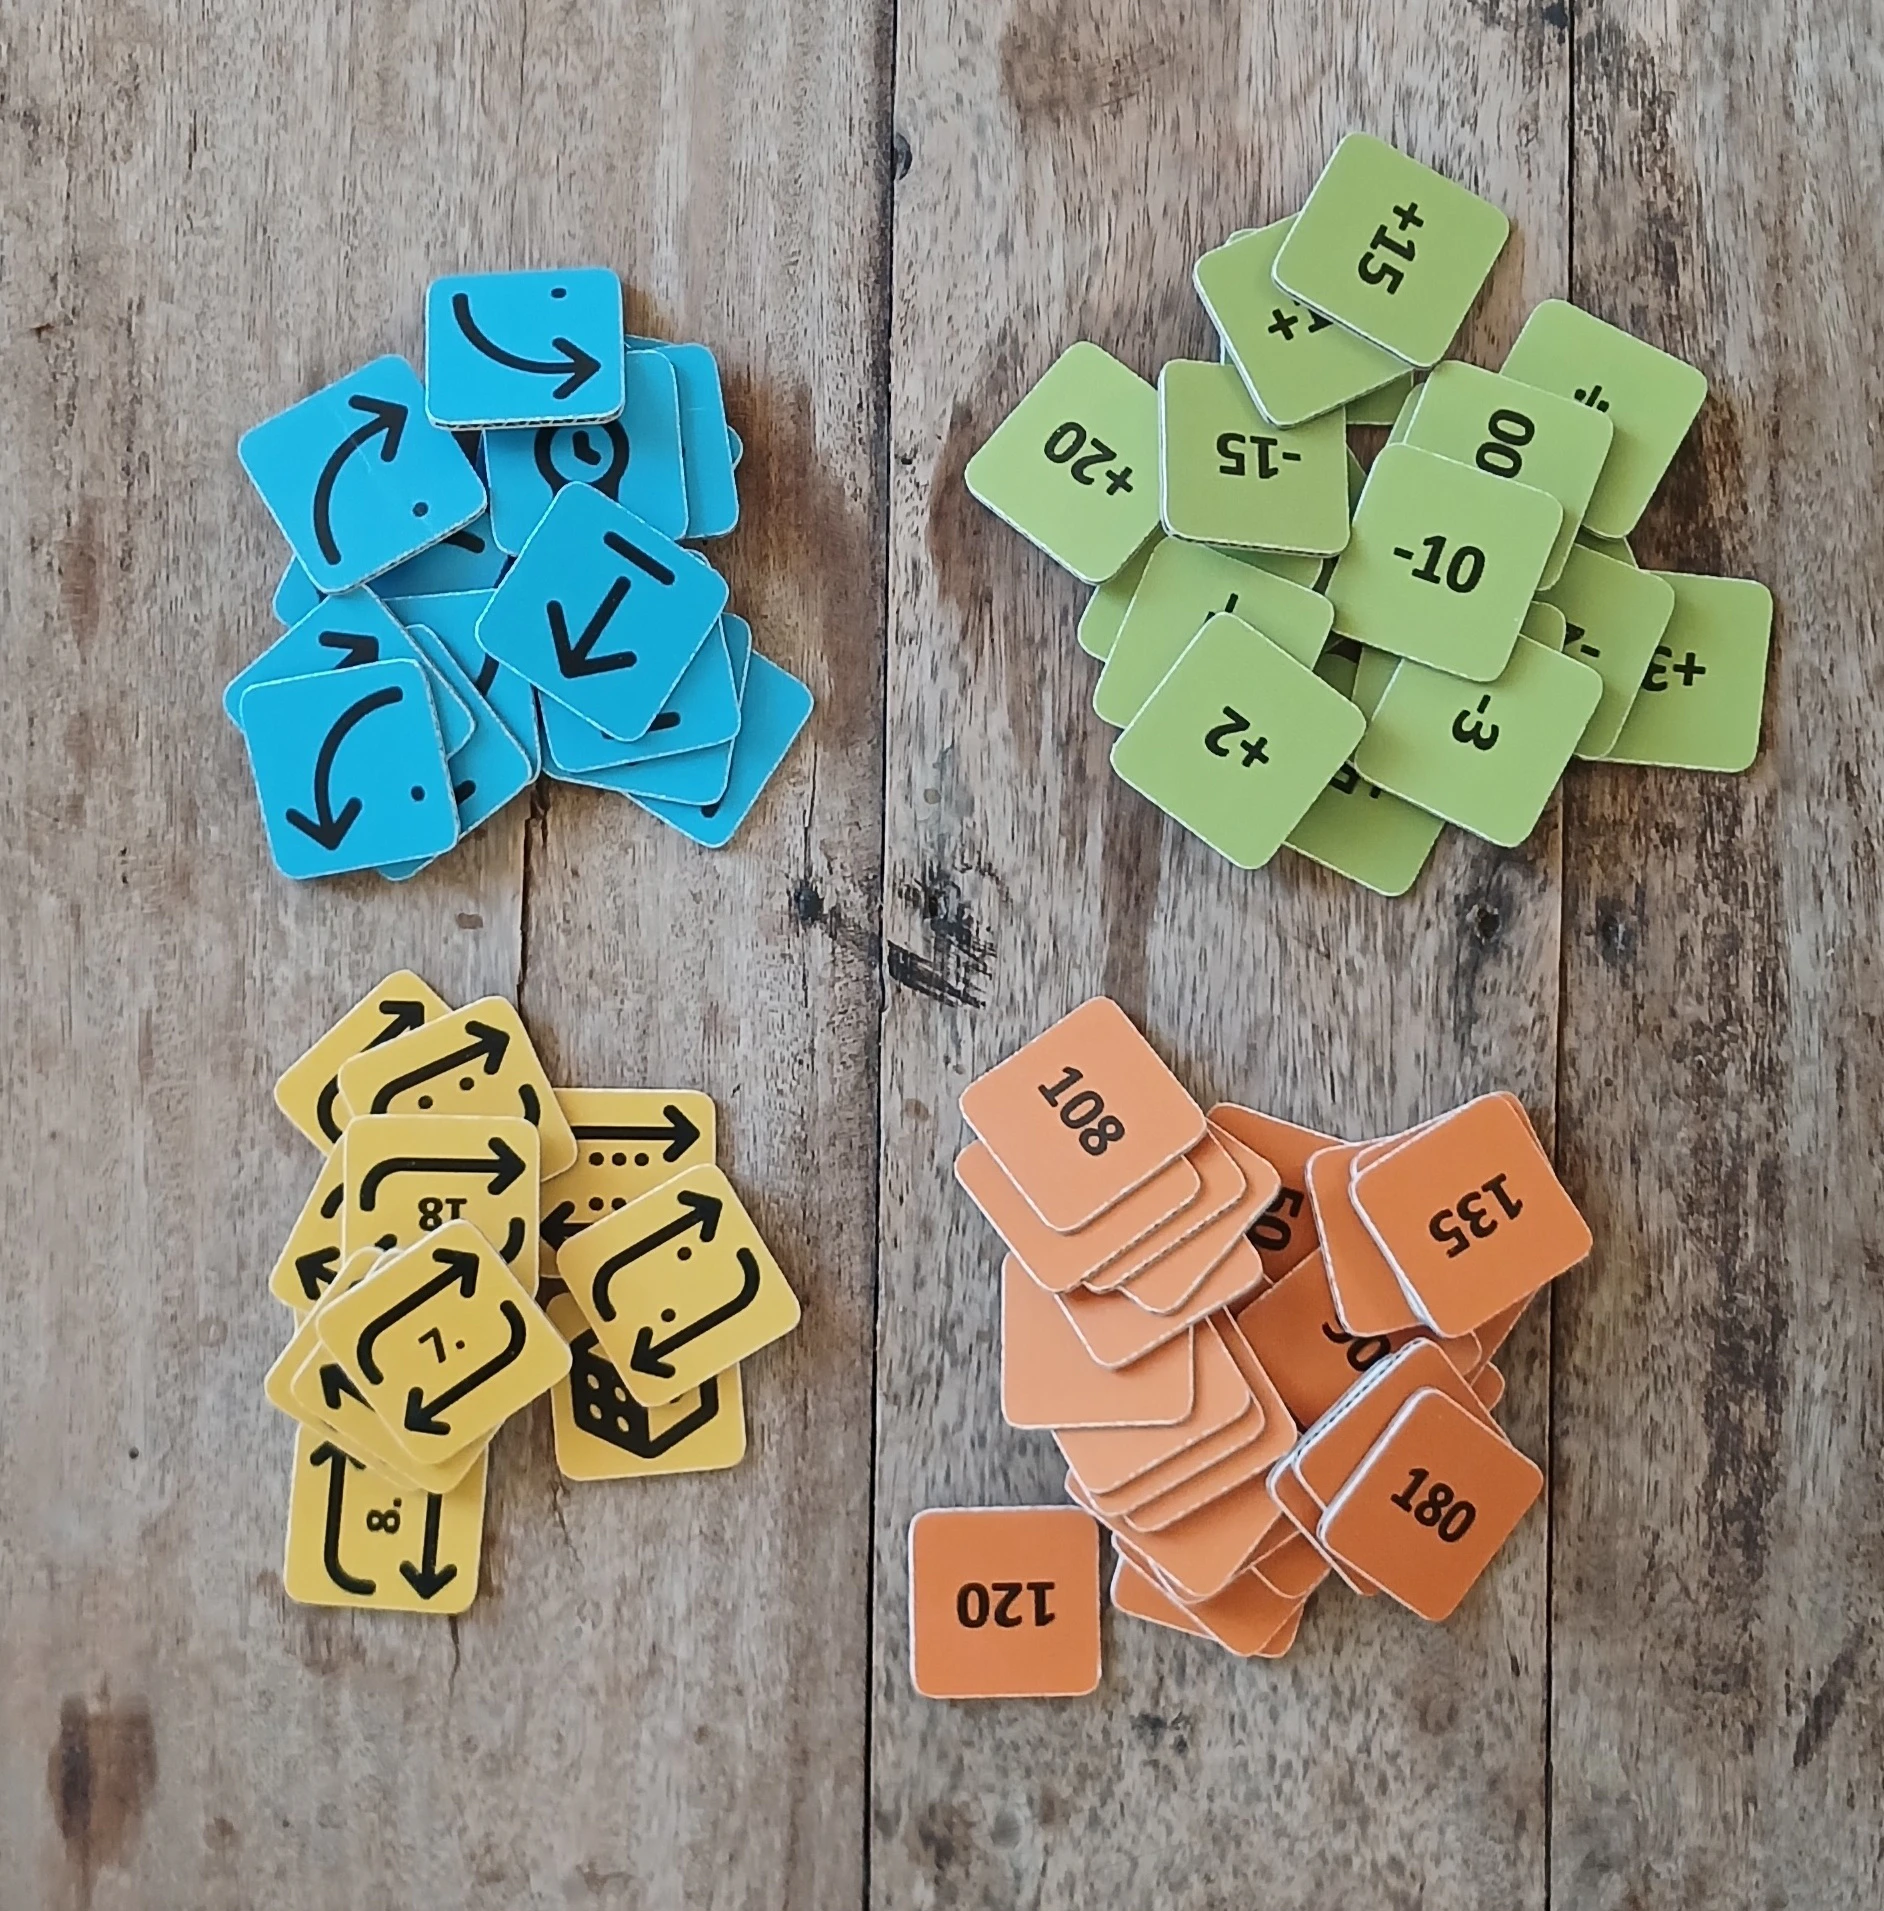
Command Chips
Basic blocks for composing the control program:- Forward — forward movement (15 cm by default)
- Right — 90° clockwise turn
- Left — 90° counterclockwise turn
- Backward — backward movement (15 cm by default)
- Function — executes the subroutine from the lower part of the remote
- Random Movement — one of the actions to move the robot: Forward, Left, Right, or Backward (on “default step”)
- Repeat Chips (Loops) - Chips with numbers from 2 to 6 (by number of dots) and repeat pictograms with the number inside. The chip with a die means a random number of repeats from 1 to 6.
Numerical value and arithmetic chips are also used to expand programming capabilities: for example, repeating a command or changing the movement angle/distance.
Value Chips
Angle and distance chips: 30°, 36°, 45°, as well as multiples (60°, 72°, etc.). Angles in degrees, distances in millimeters. By default — 90° and 100 mm (15 cm).Arithmetic Operation Chips
Modify movement command parameters:- Addition (+)
- Subtraction (−)
- Multiplication (*)
- Division (/)
- Square Root (√)
- Power (^)
Connecting the Remote and Robot
It is recommended to turn on the robot first, then the remote. Place the robot on a flat surface before connecting: after pairing, the LEDs turn white. If there is no connection, they flash red. Check the connection: place the “Forward” chip and press “Execute”. If there is no connection, restart both devices or charge them. Temporary connection loss may occur near strong electromagnetic field sources (mobile phone, WiFi hotspot).After updating the device software, pairing may be required: turn on the robot, then the remote, press and hold the “Execute” button on the remote for 10–15 seconds, until a sound signal is heard.
How It Works?
To program movement, place command chips in the remote slots (for example, “Forward”, “Left”, “Function”, etc.). You can set command values and repeat counts, as well as angle, distance, and arithmetic operation values. For joint installation of a command and value (repeat), slots are connected by “bridges” with indicators. Below is a program using a loop as an example to repeat a similar code section. The program creates a square movement path for the robot:
- “Forward” — 15 cm.
- “Left/Right” — 90°.
- Loops (repeats) repeat the command multiple times.
- “Function” calls the subroutine from the lower part of the remote (5 slots).
- You can call a subroutine multiple times via a loop by adding a repeat chip to “Function” (example shown above).
Important Functions:
- Interrupt program execution by pressing “Execute” again during movement.
- The remote remembers the last set value (distance/angle) for the movement command until power-off: for example, if “Forward” = “200”, all subsequent “Forward” commands are executed with this value.
- Values after arithmetic operations are also saved.
- Change the “default distance” using a service chip: for example, for 12.5 cm, place the “Default Distance” chip with value 125. The value is saved after power-off.
- The remote and robot automatically power off after 10 minutes of inactivity.
- If the robot is not used for 1–3 minutes, it makes small movements to signal it is active and ready.
- Robot eye blink sound can be turned on and off with a single press of the robot button.
- Remote control sound can be turned on and off by holding the “Execute” button for 5 seconds.
- After a software update, robot movement calibration may be needed.
- Robot software reset is possible by holding the button for 10 seconds.
- Remote and robot pairing may be necessary after updating device software, established by holding the “Execute” button on the remote for 10-15 seconds.
Robot Calibration:
- Mark the exact orientation of the robot on the table surface.
- Using any program, achieve 8 robot turns at the default angle - 90 degrees clockwise (for example, execute a right turn 8 times), the robot should make two full 360-degree rotations = 90*8.
- Then evaluate the deviation angle from the robot’s initial position and execute the “Calibration” command with the value needed for normalization: if the robot stops before the initial mark, add the arithmetic operation ”+ angle” (for example +10), if the robot stops after the mark, add ”- angle” (for example -5).
- Calibration can be performed multiple times to achieve the best result.
- Attention! Robot calibration reset is performed by pressing the control button for more than 10 seconds.
Calibration of the first device version (MVP) with 10 cm diameter robot
Calibration of the first device version (MVP) with 10 cm diameter robot
- To calibrate the gyroscope, place the robot on a horizontal surface, insert the “Calibration” chip into the remote and press “Execute”.
- To calibrate the movement distance, measure the actual path with the “Forward” command, place “Calibration” and the chip with the required value, then “Execute”. You can write the value to any digital NFC chip using a mobile phone with NFC as text in the form nXXX (for example, n095 for 95 mm). After this, the robot’s movement distance will be accurate.*
Programming NFC Chips
You can modify or create your own chips - commands, digital values, or arithmetic operations using a phone with NFC and a tag read-write program, for example “NFC Tools”. You can write a value to a blank digital NFC tag - chip using a mobile phone with NFC as simple text in the form of 4 characters.Important!
The kit is not intended for children under 4 years and contains small parts — choking hazard! Use only under adult supervision!The device contains Li-ion batteries. Charge only under adult supervision using standard USB 5V and USB-C cable. Charging the remote and robot (1 hour) is enough for 1–2 lessons; a full charge (2–3 hours) — for 3 lessons of 30–45 minutes. Over time, battery capacity may decrease, replacement with new 16340 Li-ion batteries is possible. If the set is not used for a long time, charge the batteries once every 2-3 months. With deep discharge, batteries may fail and require replacement. Do not open the device yourself — in case of malfunction or need to replace batteries, contact the seller or specialized electronics repair centers. Store and use the set in a dry room at a temperature of +10…+30°C, humidity 45–60%. Avoid direct sunlight, moisture, and dust. Avoid shocks and vibrations. Transport and store the device in its original packaging at a temperature of +5…+35°C, protecting from mechanical damage and moisture. p.s.: PrimaSTEM is a practical tool for learning programming, developing creative thinking and logic. Detailed information about functionality is contained in the Teacher’s Guide.